Hanging drywall may seem intimidating, but with the right tools, preparation, and a clear plan, it’s a beginner-friendly project that can transform any room. Whether you’re finishing a basement, repairing damaged walls, or tackling a full remodel, drywall installation is one of the most important steps toward creating a polished, professional-looking space.
In this guide, we’ll cover everything you need to know about hanging drywall — from preparation and measuring to screwing panels in place and finishing seams.
Tools and Materials You’ll Need
Before you start, gather all the necessary tools and materials. Having everything on hand will make the job faster and easier.
Essential Tools:
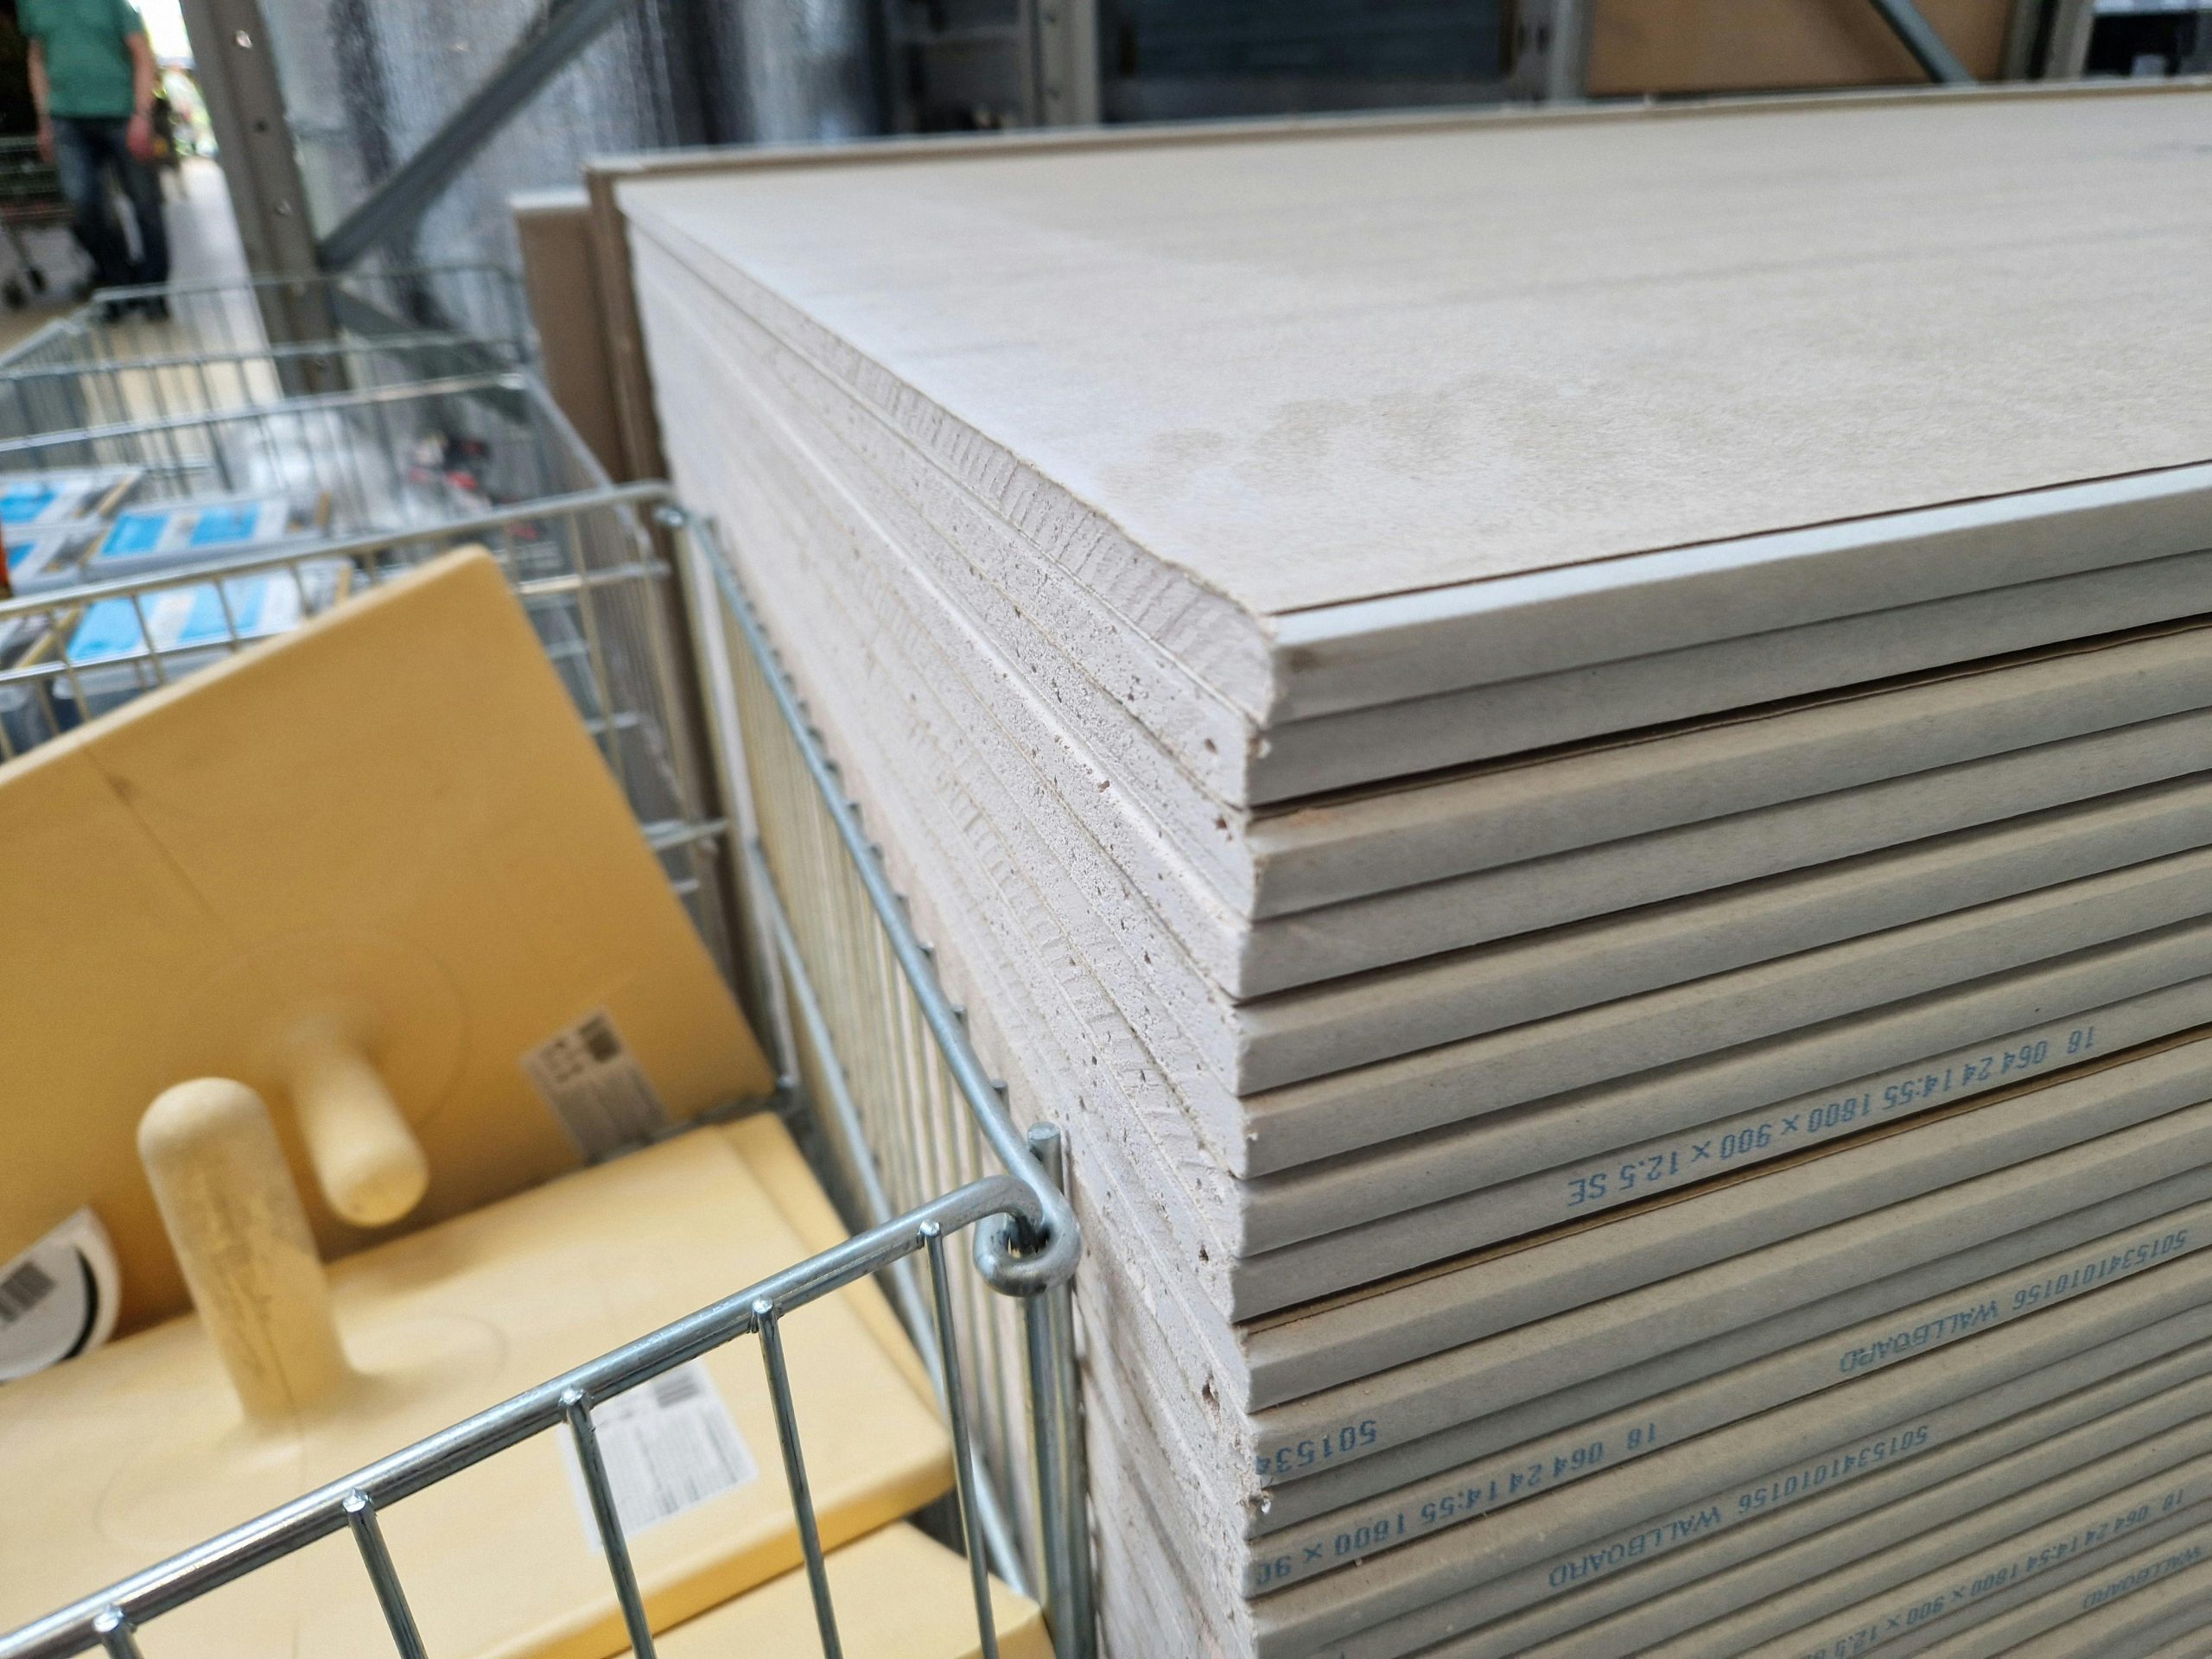
- Drywall panels: Choose 1/2-inch for most walls, or 5/8-inch for ceilings.
- Drywall screws: Coarse-thread for wood studs, fine-thread for metal studs.
- Screw gun or drill: For securing drywall quickly and evenly.
- Utility knife: For trimming drywall to size.
- T-square or straight edge: Ensures straight cuts.
- Drywall lift (optional): Helps hold panels in place on ceilings.
- Tape measure: For precise measurements.
Finishing Materials:
- Drywall tape (paper or mesh)
- Joint compound
- Sanding sponge or pole sander
Having these ready before you begin will keep your project running smoothly and help prevent mistakes.
Step 1: Prepare the Work Area
Proper preparation is key to a successful drywall installation.
- Clear the room: Remove furniture, wall hangings, and obstacles.
- Inspect studs: Ensure framing is straight and secure. Use shims if necessary to create a flat surface.
- Mark stud locations: Use a pencil to mark where studs are on the floor and ceiling for easy screw placement later.
Pro Tip: Take this time to double-check any wiring, plumbing, or insulation that needs to be completed before hanging drywall.
Step 2: Measure and Cut the Panels
Measure the height and width of your walls and cut panels to fit. Use a T-square and utility knife to score the drywall along the cut line, then snap it cleanly.
- Always cut slightly smaller than the space to allow for easy fitting.
- For electrical boxes or windows, measure carefully and cut openings with a keyhole saw.
If you need a refresher on making clean, straight cuts, check out our guide on how to cut drywall for a step-by-step process.
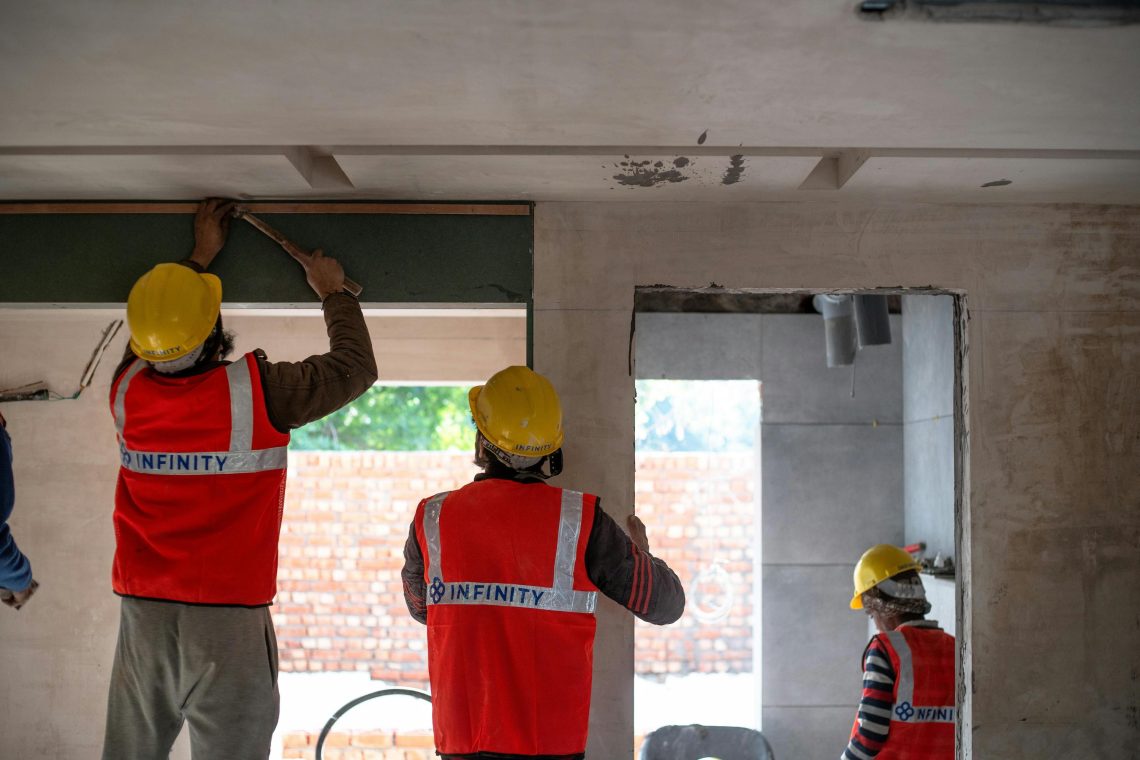
Step 3: Hang Drywall on the Ceiling First
Start with the ceiling panels before moving to the walls. This creates a cleaner finish and helps lock the wall panels in place.
- Use a drywall lift or have a partner hold the panel overhead.
- Position the first sheet flush against a corner.
- Secure it with drywall screws every 12 inches along the joists.
- Stagger seams between sheets to add strength.
Working from the ceiling down ensures your wall panels fit tightly and reduces gaps.
Step 4: Hang Drywall on the Walls
Once the ceiling is done, move to the walls.
- Start with the top row: Position the first sheet horizontally against the ceiling.
- Screw placement: Space screws 16 inches apart along studs, and 8 inches apart on the edges.
- Stagger seams: Avoid having vertical seams line up between rows — this prevents weak spots.
- Work your way down: Complete the bottom row last, cutting panels to fit as needed.
Pro Tip: Leave a small 1/2-inch gap at the bottom of the wall to prevent moisture damage. You can cover it later with baseboards.
Step 5: Secure Panels Properly
Drywall needs to be firmly attached to avoid sagging or shifting later.
- Sink screws slightly below the surface without tearing the paper face.
- Avoid overdriving screws, which can weaken the panel.
- Double-check that all panels are secure before moving to finishing.
Step 6: Tape and Mud the Seams
Finishing the seams is what gives your drywall a smooth, professional appearance.
- Apply tape: Cover all joints with paper or mesh tape.
- First coat of mud: Apply a thin layer of joint compound over the tape using a 6-inch taping knife.
- Second and third coats: Feather out the edges with wider knives (10–12 inches) for a smooth transition.
- Sand lightly: Use a sanding sponge between coats for a polished finish.
Take your time with this step — smooth seams make painting and decorating much easier.
Step 7: Inspect and Touch Up
Once the final coat is dry, check for imperfections.
- Run your hand over seams to feel for bumps or ridges.
- Sand rough spots until smooth.
- Apply a thin skim coat if necessary for a perfect finish.
Common Mistakes to Avoid

Even experienced DIYers can run into issues when hanging drywall. Avoid these pitfalls to save yourself time, money, and frustration later:
- Not Planning Screw Placement: Failing to plan where your screws go can result in weak spots that compromise the wall’s strength. Always aim for screws to hit studs or ceiling joists and space them 12–16 inches apart for a secure hold.
- Overcutting Panels: Cutting panels too large or too small creates uneven gaps and wasted material. Measure twice and cut once — precision makes the seams easier to tape and mud later.
- Over-Sanding Seams: It’s tempting to sand aggressively, but this can tear the drywall paper and create low spots. Use light, even strokes and switch to fine-grit sandpaper as you get closer to a smooth finish.
- Skipping Ceiling-First Installation: Hanging drywall on the walls before the ceiling leaves you with awkward gaps and uneven joints. Always install ceiling panels first so wall sheets can butt up tightly against them.
- Using Too Many Joints: Avoid creating small drywall pieces that require extra seams — fewer joints mean less mudding, sanding, and potential for cracks.
- Ignoring Moisture-Prone Areas: Regular drywall isn’t suitable for bathrooms, basements, or laundry rooms. Use moisture-resistant drywall (green board) in these spaces to prevent mold growth.
By taking your time, planning ahead, and using the right materials, you’ll end up with a smooth, durable finish that looks professional.
Safety Tips for Drywall Installation
Drywall work can be dusty and physically demanding. Protect yourself and your workspace:
- Wear safety glasses to prevent dust from irritating your eyes.
- Use a dust mask or respirator when cutting or sanding.
- Gloves help protect hands from abrasions and cuts.
- Keep your work area clear to avoid tripping hazards.
Safety precautions keep your project injury-free and your results professional.
When to Call a Professional
Hanging drywall is a manageable DIY project, but some situations may require professional help:
- Large remodels or whole-house projects
- Walls with complex curves or angles
- When working around plumbing or electrical rerouting
- If you need a perfectly smooth, paint-ready finish
A pro can complete the job faster and with fewer mistakes, saving you time on sanding and finishing.
Final Thoughts
Learning how to hang drywall is an excellent skill for any homeowner. By preparing your space, cutting and securing panels properly, and taking your time with taping and mudding, you can create a smooth, professional finish that’s ready for paint or wallpaper.
Patience is key — rushing the process often leads to uneven seams and more sanding later. With the right tools and a step-by-step approach, your drywall project can dramatically improve the look and feel of your home.